
So you just picked up a Canon C100 Mark II. What a fantastic camera: 12 stops of dynamic range, Dual Pixel CMOS AF, built-in ND filters, 320 to 102,400 ISO range, and much, much more! In order to get the most out of your new purchase, it is important to configure everything correctly.

Auto Black Balance: Canon recommends that you perform an Auto Black Balance any time you change the ISO. Making sure your lens cap is on, go to the Camera Setup Menu and select ABB. Click OK to perform the function. You may notice some irregularities display on the screen, but this is normal and not a malfunction.
Set ISO to 850 for maximum Dynamic Range: In order to obtain the full maximum Dynamic Range of the C100 Mark II, you want to set the ISO to a minimum of 850. If you set the ISO to anything lower than that you will begin to lose information and detail in the highlights. Canon has even added brackets around ISO 850 in the overlays so you don’t forget.
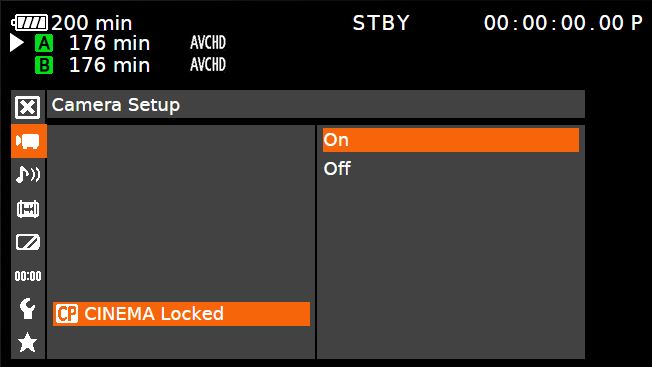
Set to record Canon Log: Enabling the camera to record Canon Log will give you a flat image that you can grade superbly in post-production. Under the Camera menu, select CP Cinema Locked and set it to On. Pair this setting with a C100 LUT in post, and you can get some truly amazing-looking footage!
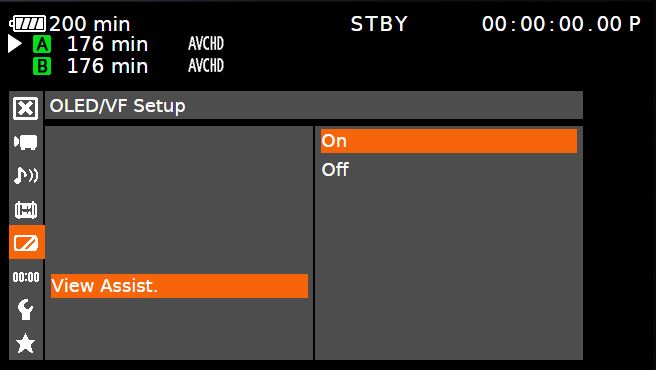
Enable View Assist: Once you set to record Canon Log, you may notice the image on the OLED monitor is extremely flat. This can make it difficult to properly expose your footage. Under the OLED/VF Setup menu, select View Assist and set it to On. This will change what you see on screen to make it look more like what the exposure and contrast will look on the final graded image.
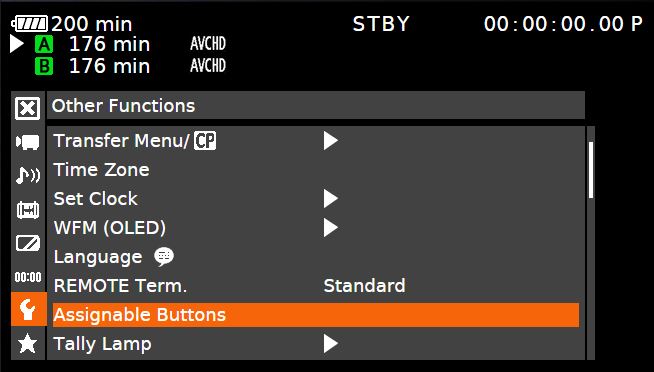
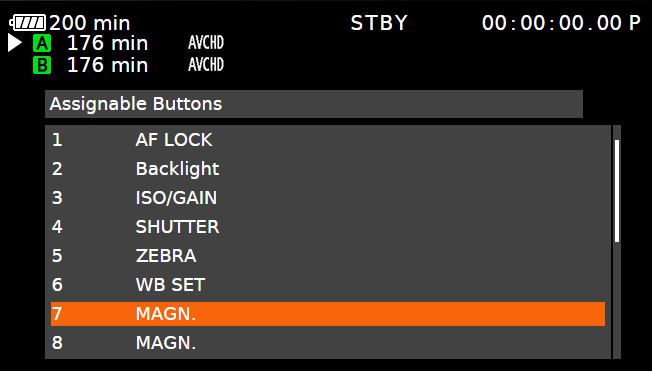
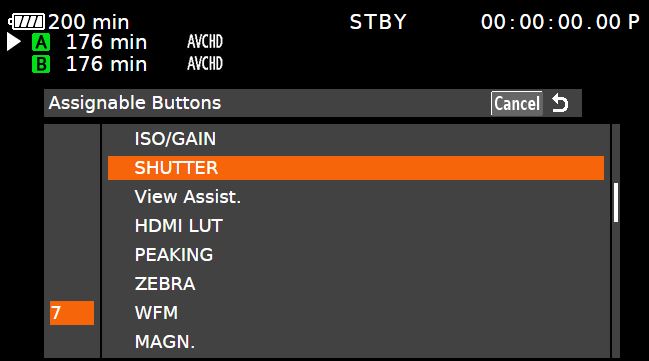
Button Remapping: The C100 Mark II features 17 assignable buttons that allow you customize and simplify your shooting workflow. To remap a function to a different button location, select Other Functions > Assignable Buttons. From there can select which button you want to assign a function to. Once you select the button you can then select which function you would like to assign to it.
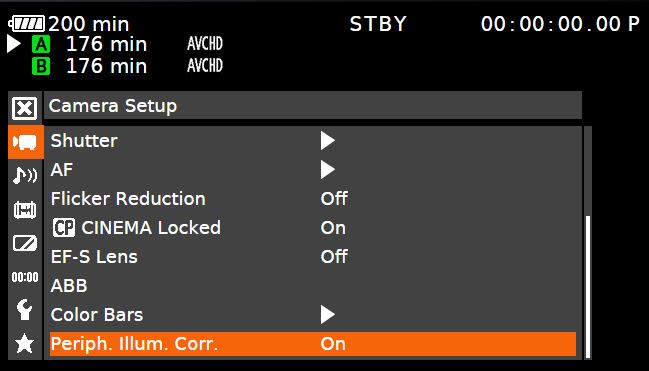
Peripheral Illumination Correction: This option is not available for all Canon lenses. Peripheral Illumination Correction automatically fixes vignetting and barrel distortion issues on supported lenses. To activate this feature, under Camera Setup, set Peripheral Illumination Correction to On (will be grayed out if not supported by your lens).
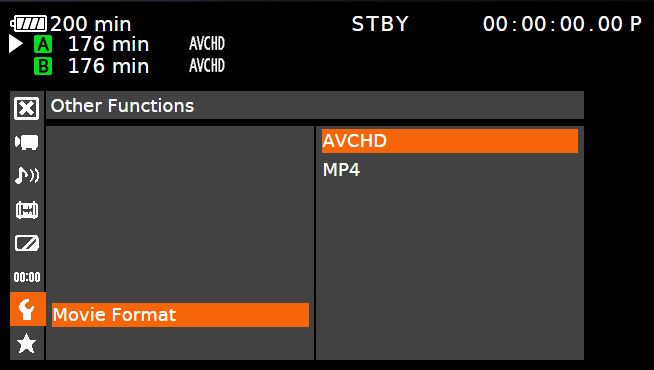
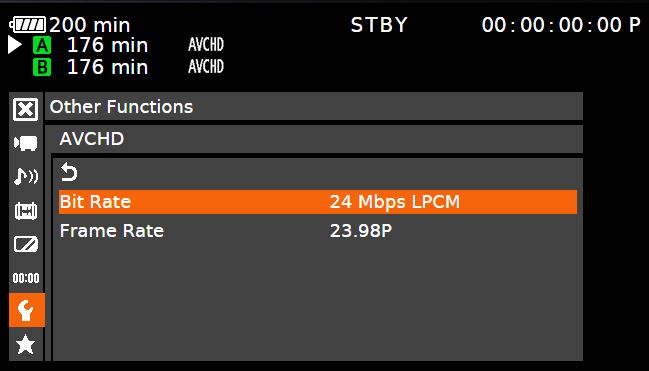
Recording Format: To take full advantage of the Super 35mm CMOS Sensor, you will want to record using the best settings available. Under the Other Functions menu, select Movie Format and choose AVCHD. Then, under AVCHD menu, select Bit Rate 24 Mbps LPCM. LPCM allows you to record uncompressed audio.
With these settings in place, you will be getting the best quality image the C100 Mark II has to offer! Happy filming!
Get a $1,000 instant rebate when you purchase a Canon C100 Mark II!
CANON C100 MARK II CINEMA EOS CAMERA
CANON C100 MARK II CINEMA EOS CAMERA W/ EF-S 18-135MM LENS
CANON C100 MARK II CINEMA EOS CAMERA W/ 24-105MM LENS
CANON C100 MARK II CINEMA EOS CAMERA W/ ATOMOS NINJA 2
CANON C100 MARK II CINEMA EOS CAMERA TRIPLE LENS KIT
Apply for a Canon Cinema EOS C100 Mark II lease: 1.99% & 0% Interest Lease Program. Canon ITCG, in partnership with Canon Financial Services, Inc. is offering 1.99% financing for 36 months and 0% for 24 month leases.
